 |
| Progress on top of the boiler |
However, the progress shown above misses the steps involved. It began with manhandling of the first casting from floor level to the top of the boiler where the aerial convergent plate-way could take over.
 |
| Looking towards the rear, the first casting is held by the strap |
 |
| Casting moved above the final location |
 |
| Not all is perfect |
 |
| Extra cut-away to accommodate the nut |
When exhaust steam blasts up the chimneys, air should be drawn up through the firebox. If there is any leakage between the chimney and the boiler top plate, the suction will be reduced and steaming will not be as efficient as it should be.
I concluded that to merely bolt down each casting on to the top plate would not be good enough and that a gasket of some description would be required.
I was recommended to have a look at the Vitcas website for inspiration. I found some ceramic felt tape about 10mm wide and 3mm thick and some fire clay mastic.
I used the mastic to stick the tape in place as in the photo below.
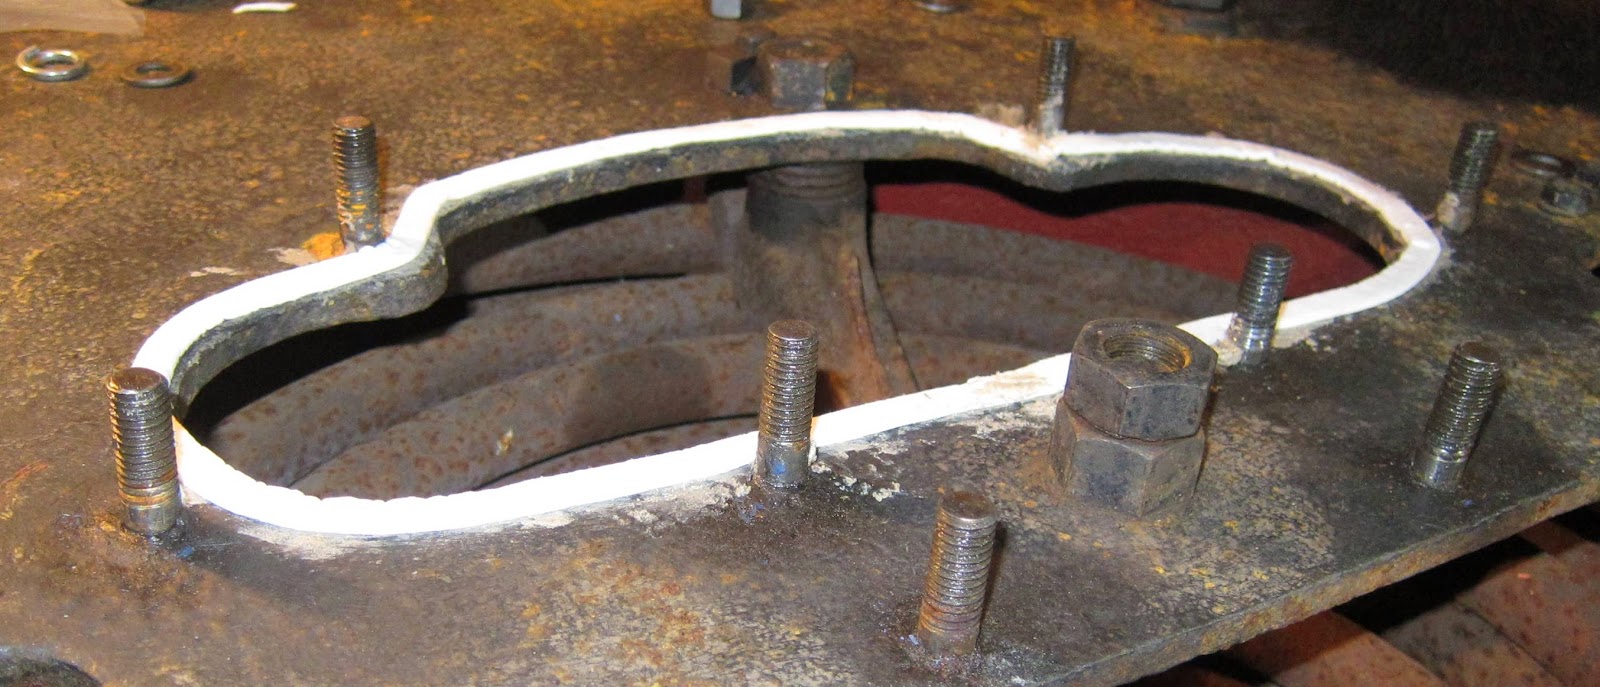 |
| Ceramic 'felt' seal around the chimney base |
 |
| Casting fully seated (1) |
 |
| Casting fully seated (2) |
It's worth noting a previous article about the sinking centre section of the boiler top plate. Before putting the castings in place, I slackened the nuts which hold the strut supporting the superheater's baffle plate. This left the top plate so that it would be flattened when the castings were tightened down and indeed this was the case. The baffle plate can then be tightened up.
The second casting was handled in the same way as the first and went in without needing to grind away space for the other superheater nut.
 |
| Both castings in place |
 |
| RHS Bifurcating exhaust pipe fitted |
 |
| View down through to the superheater showing the blast nozzles (My boots were clean at the start of the day!) |
No comments:
Post a Comment